모든내용은 아래에서 위로
배열을 사용하여 버튼 이벤트 생성


public class JavaExam {
public static void main(String[] args) {
new P02_Button();
}
}
class P02_Button{
public P02_Button() {
run();
}
private void run() {
JFrame frame = new JFrame();
JPanel panel = new JPanel();
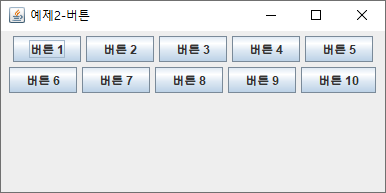
JButton[] button = new JButton[10];
for(int i=0; i<10; i++) {
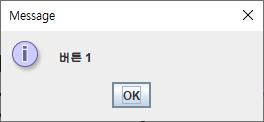
button[i] = new JButton("버튼 "+(i+1));
button[i].addActionListener(new MyButtonClickListener());
panel.add(button[i]);
}
frame.add(panel);
frame.setTitle("예제2-버튼");
frame.setLayout(new GridLayout(2,5,10,10));
frame.setBounds(100, 100, 400, 200);
frame.setVisible(true);
frame.setDefaultCloseOperation(JFrame.EXIT_ON_CLOSE);
}
private class MyButtonClickListener implements ActionListener {
@Override
public void actionPerformed(ActionEvent e) {
JButton btn = (JButton)e.getSource();
JOptionPane.showMessageDialog(null, btn.getText());
}
}
}배열을 사용하여 버튼 생성
- FlowLayout() + frame.pack() 사용

- GridLayout(2,5) + frame.setBounds() 사용 : frame.pack() 동작안함
class P02_Button{  // JFrame을 상속받지 않은 예제
    public P02_Button() {
        run();
    }
    private void run() {
        JFrame frame = new JFrame();
        JPanel panel = new JPanel();

        // 버튼 컴포넌트를 생성
        for(int i=1; i<=10; i++) {
        	panel.add(new JButton("버튼 "+i));
        }

        // 패널을 프레임에 붙이기
        frame.add(panel);

        //기본 창 꾸미기
        frame.setTitle("예제2-버튼");
//        frame.setLayout(new FlowLayout());
//        frame.pack();
        frame.setLayout(new GridLayout(2,5,10,10));
        frame.setBounds(100, 100, 400, 200);
        frame.setVisible(true);
        frame.setDefaultCloseOperation(JFrame.EXIT_ON_CLOSE);
    }
}
버튼 클릭 이벤트
방법#1
// 버튼 컴포넌트를 생성
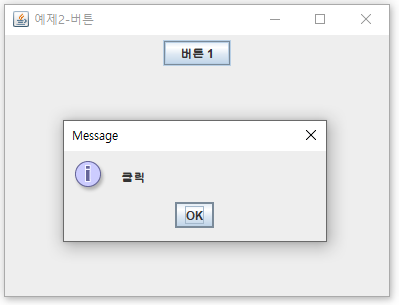
JButton button = new JButton("버튼 1");
// 버튼 클릭 이벤트 추가
button.addActionListener(new ActionListener() {
@Override
public void actionPerformed(ActionEvent e) {
// TODO Auto-generated method stub
JOptionPane.showMessageDialog(null, "클릭");
}
});방법 #2
// 버튼 컴포넌트를 생성
JButton button = new JButton("버튼 1");
// 버튼 클릭 이벤트 추가
button.addActionListener(e -> {
    JOptionPane.showMessageDialog(null, "클릭");
});
방법 #3
class P02_Button{
    public P02_Button() {
        run();
    }
    private void run() {
        // 버튼 컴포넌트를 생성
        JButton button = new JButton("버튼 1");
        // 버튼 클릭 이벤트 추가
        button.addActionListener(new MyButtonClickListener());
    }

    // ActionListener를 구현하는 사용자가 만든 커스텀 리스너 생성
    private class MyButtonClickListener implements ActionListener{
		@Override
		public void actionPerformed(ActionEvent e) {
			JOptionPane.showMessageDialog(null, "클릭");
		}
    }
}
전체 코드 #1 ~ #2
public class JavaExam {
    public static void main(String[] args) {
        new P02_Button();
    }
}
class P02_Button{  // JFrame을 상속받지 않은 예제
    public P02_Button() {
        run();
    }
    private void run() {
        JFrame frame = new JFrame();
        JPanel panel = new JPanel();

        // 버튼 컴포넌트를 생성
        JButton button = new JButton("버튼 1");
        // 버튼 클릭 이벤트 추가
        button.addActionListener(new ActionListener() {
			@Override
			public void actionPerformed(ActionEvent e) {
				// TODO Auto-generated method stub
				JOptionPane.showMessageDialog(null, "클릭");
			}
		});

// 방법#2
//        button.addActionListener(e -> {
//        	JOptionPane.showMessageDialog(null, "클릭");
//        });


        // 버튼 컴포넌트를 패널(컨테이너)에 붙이기
        panel.add(button);

        // 패널을 프레임에 붙이기
        frame.add(panel);

        //기본 창 꾸미기
        frame.setTitle("예제2-버튼");
        frame.setBounds(100, 100, 400, 300);
        frame.setVisible(true);
        frame.setDefaultCloseOperation(JFrame.EXIT_ON_CLOSE);
    }
}
전체코드 #3
public class JavaExam {
    public static void main(String[] args) {
        new P02_Button();
    }
}
class P02_Button{  // JFrame을 상속받지 않은 예제
    public P02_Button() {
        run();
    }
    private void run() {
        JFrame frame = new JFrame();
        JPanel panel = new JPanel();

        // 버튼 컴포넌트를 생성
        JButton button = new JButton("버튼 1");
        // 버튼 클릭 이벤트 추가
        button.addActionListener(new MyButtonClickListener());

        // 버튼 컴포넌트를 패널(컨테이너)에 붙이기
        panel.add(button);

        // 패널을 프레임에 붙이기
        frame.add(panel);

        //기본 창 꾸미기
        frame.setTitle("예제2-버튼");
        frame.setBounds(100, 100, 400, 300);
        frame.setVisible(true);
        frame.setDefaultCloseOperation(JFrame.EXIT_ON_CLOSE);
    }

    // ActionListener를 구현하는 사용자가 만든 커스텀 리스너 생성
    private class MyButtonClickListener implements ActionListener{
		@Override
		public void actionPerformed(ActionEvent e) {
			JOptionPane.showMessageDialog(null, "클릭");
		}
    }
}
버튼생성 기본
public class JavaExam {
public static void main(String[] args) {
new P02_Button();
}
}
class P02_Button{ // JFrame을 상속받지 않은 예제
public P02_Button() {
run();
}
private void run() {
JFrame frame = new JFrame();
JPanel panel = new JPanel();
// 버튼 컴포넌트를 생성
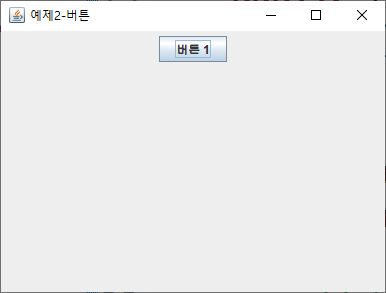
JButton button = new JButton("버튼 1");
// 버튼 컴포넌트를 패널(컨테이너)에 붙이기
panel.add(button);
// 패널을 프레임에 붙이기
frame.add(panel);
//기본 창 꾸미기
frame.setTitle("예제2-버튼");
frame.setBounds(100, 100, 400, 300);
frame.setVisible(true);
frame.setDefaultCloseOperation(JFrame.EXIT_ON_CLOSE);
}
}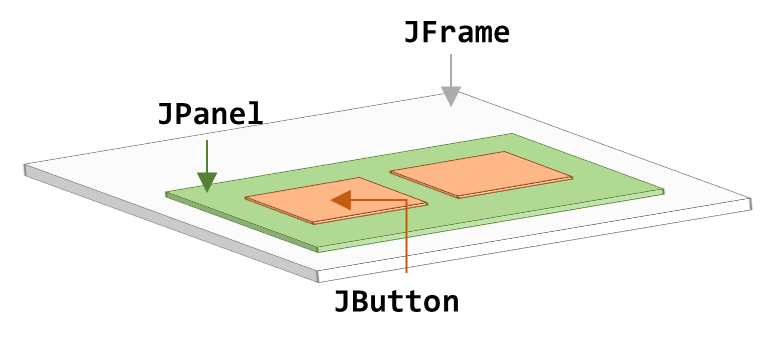
프레임 위에 패널 그위에 컴포넌트 형식으로 구성됨
- JFrame : 메인프레임
- JPanel : 패널(보조프레임)
- JButton : 컴포넌트
'PROGRAM > JAVA-SWING' 카테고리의 다른 글
| KeyEvent (0) | 2022.09.20 |
|---|---|
| Thread 2 (0) | 2022.09.19 |
| Thread (0) | 2022.09.15 |
| #02 - 버튼배열 생성(계산기 프로그램) (0) | 2022.09.07 |
| #01 - 시작하기(JFrame) (0) | 2022.09.07 |

