서보모터
- 속도와 각도를 제어하는 모터
- RC카의 방향제어, 로봇의 관절제어, 잠금장치 개폐등에 사용됨
- 서보 라이브러리를 포함
#include <Servo.h>
- 서보를 제어하기 위해서는 아래와 같이 서보라이브러리(Servo)를 사용하는 변수(servo)를 생성
Servo servo;
- 서보모터 각도 제어
- 서보변수.attach를 사용하여 각도를 제어함 (각도는 0~180까지)
- 서보모터의 각도는 시계 반대방향으로 회전
servo.attach(angle) // angle(0~180)
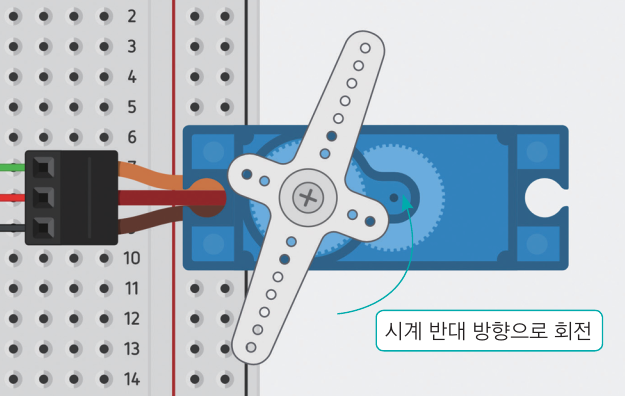
- 서보모터의 각도 0도기준으로 반시계 방향으로 회전
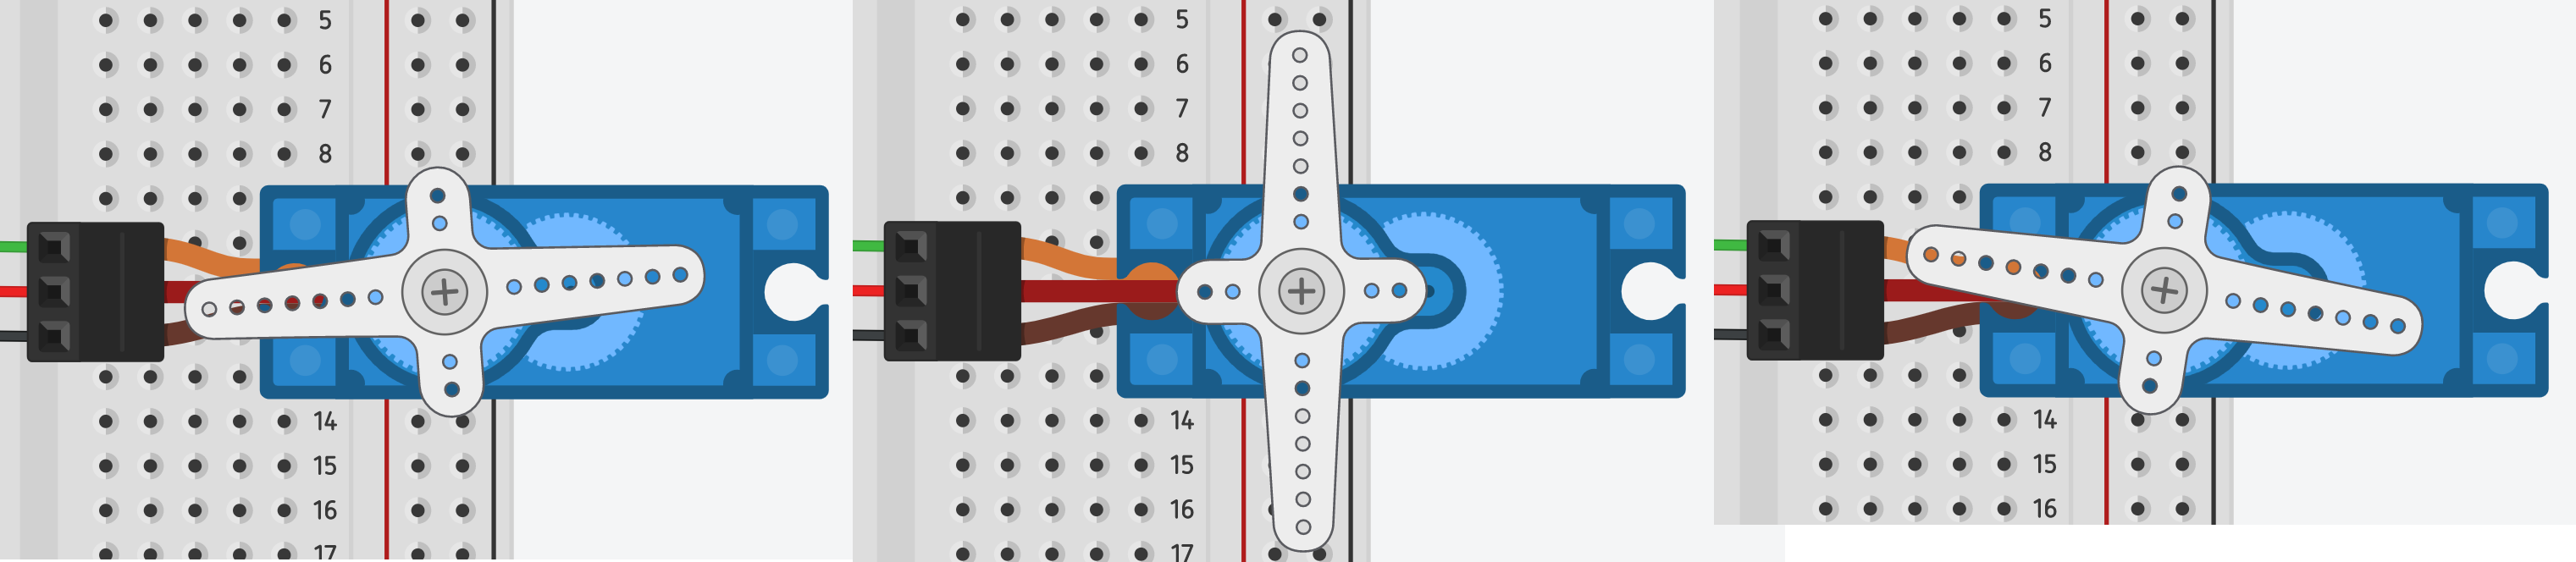
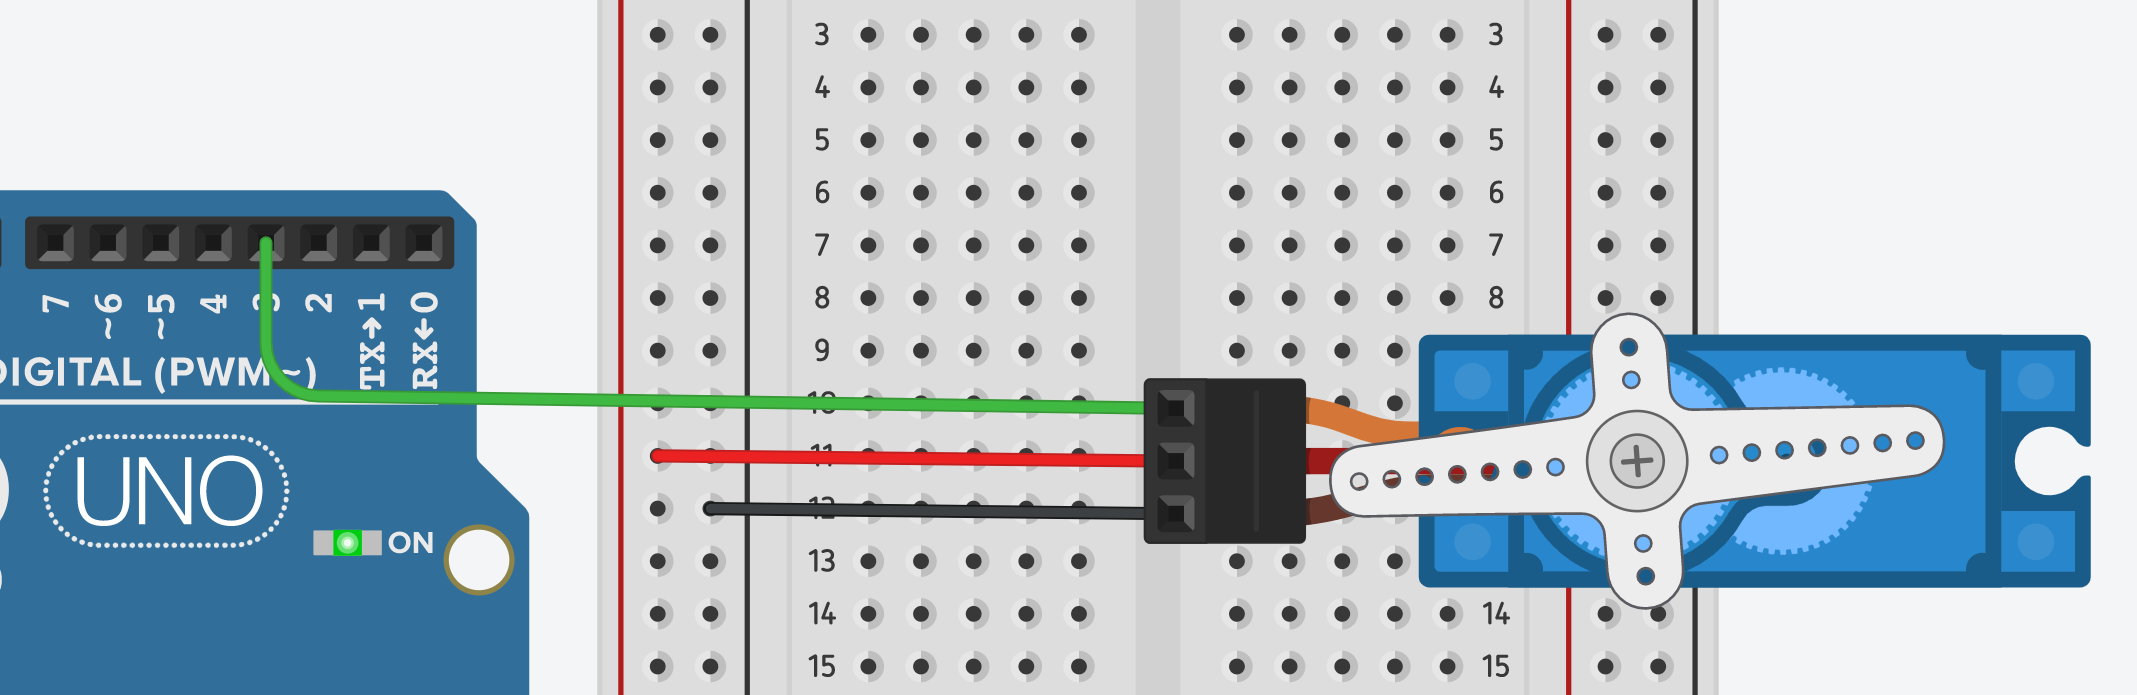
서보 연결하기
#include <Servo.h>

Servo servo;
int servoPin = 3;
void setup()
{
  servo.attach(servoPin);
}

void loop()
{
  int angle = 90;
  servo.write(angle); //각도는 0~180도 90가 기본
  delay(100);
}
시리얼 모니터로 원하는 각도 입력하기(0~180)
#include <Servo.h>
int servoPin = 3;
Servo servo;
String str = "Enter your Angle : ";
void setup()
{
servo.attach(servoPin);
Serial.begin(9600);
}
void loop()
{
Serial.print(str);
//시리얼 통신이 입력되기 전까지 While문에서 무한대기
while(Serial.available() == 0){
}
int angle = Serial.parseInt();
if( angle>=0 && angle <=180){
Serial.println(angle);
servo.write(angle);
}
else{
Serial.println("Wrong angle!!!");
}
delay(100);
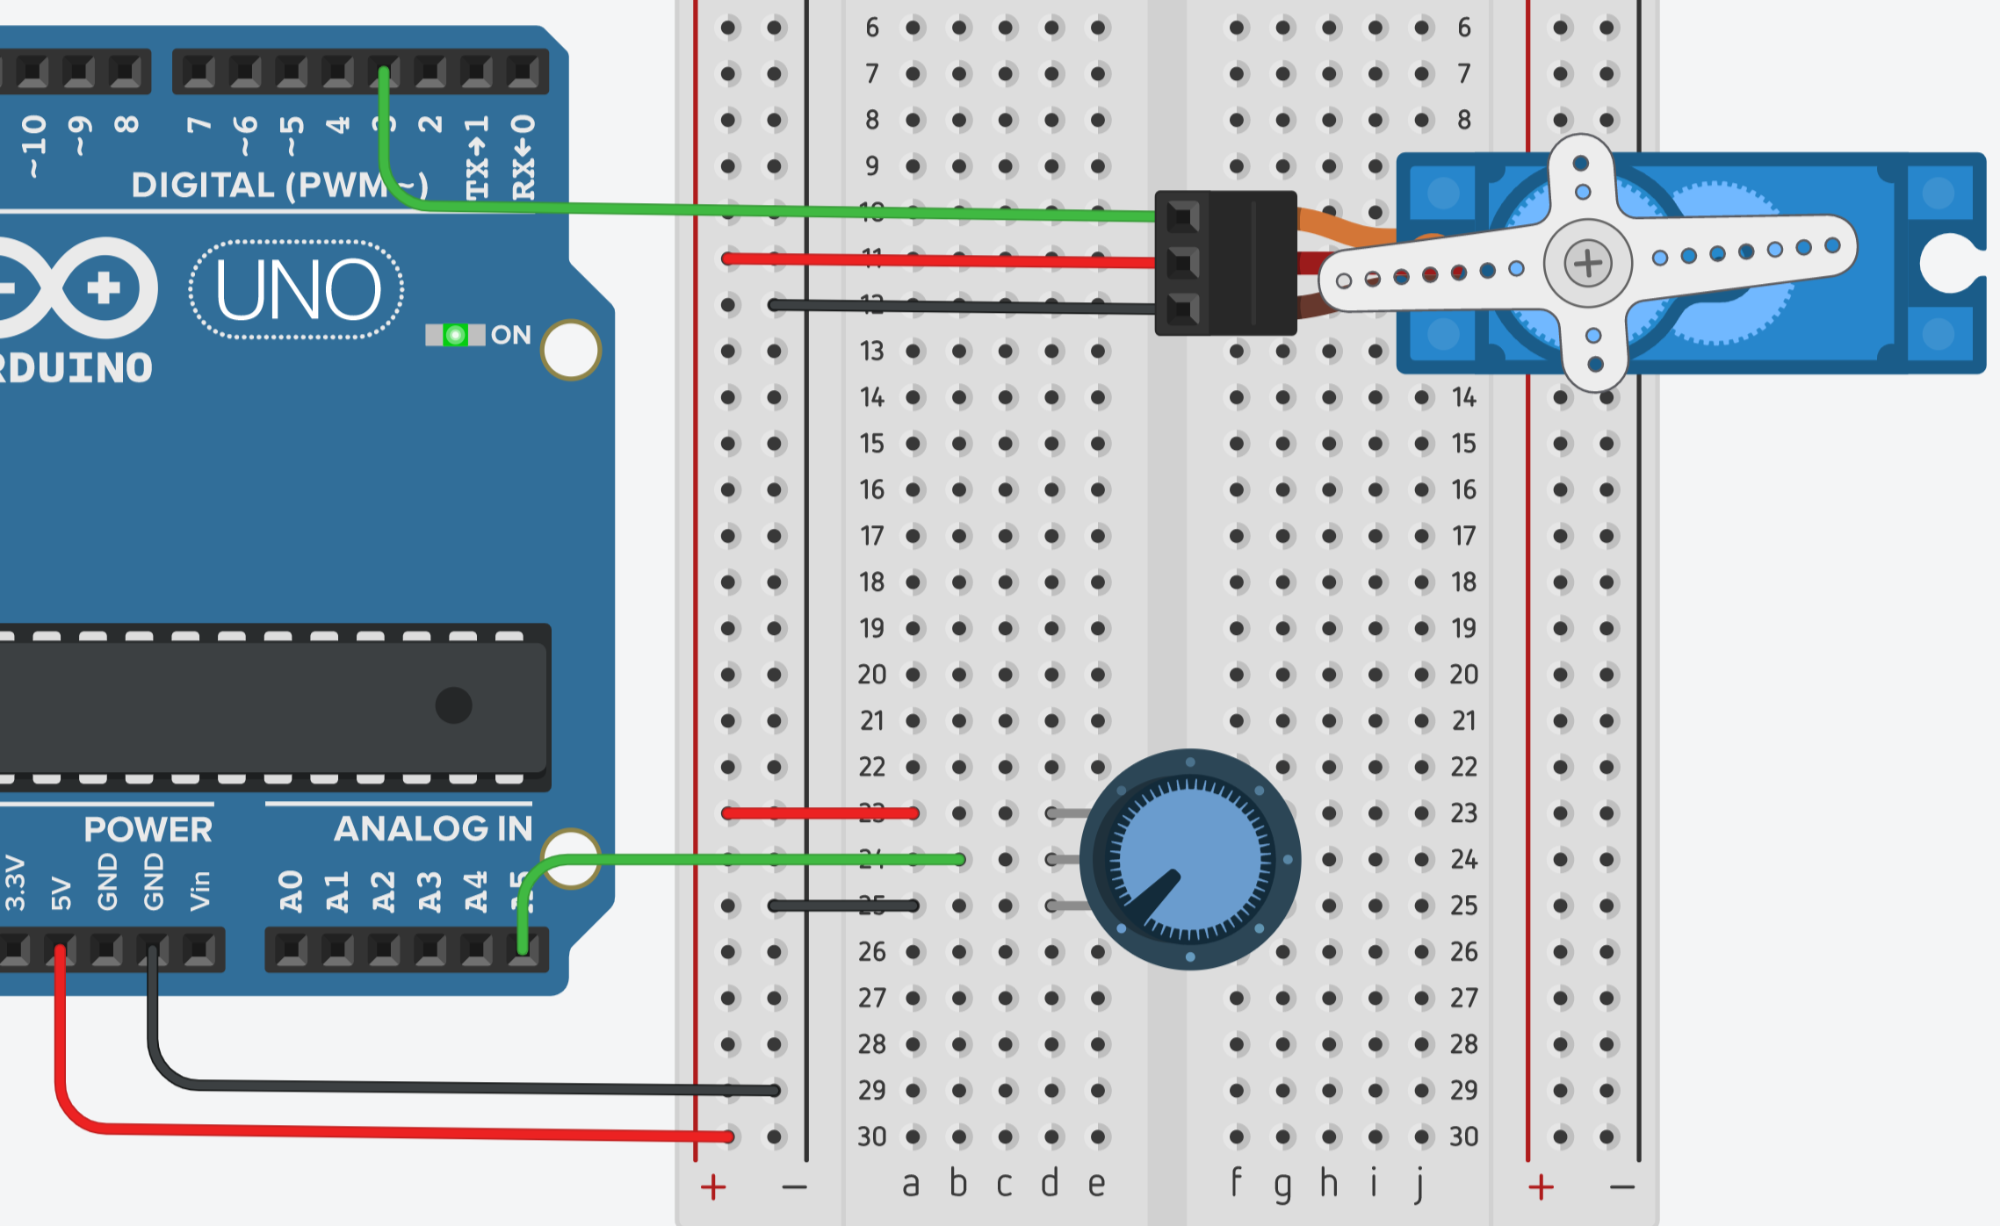
}가변저항을 사용하여 서보모니터 제어하기
#include <Servo.h>
int servoPin = 3;
int inputPin = A5;

Servo servo;

void setup()
{
  pinMode(inputPin, INPUT);
  servo.attach(servoPin);
  Serial.begin(9600);
}

void loop()
{
  int value = analogRead(inputPin);
  //map(value, fromLow, fromHigh, toLow, toHigh)
  int angle = map(value,0,1023, 0,180);
  Serial.println(angle);
  servo.write(angle);
  delay(100);
}
https://www.makerguides.com/hc-sr04-arduino-tutorial/
서보모터+초음파센서
#include <Servo.h>
#define trigPin 2
#define echoPin 3
long duration;
int distance;
int pos = 0;
Servo servo_9;
void setup()
{
  pinMode(trigPin, OUTPUT);
  pinMode(echoPin, INPUT);
  servo_9.attach(9, 500, 2500);
  Serial.begin(9600);
}
void loop()
{
  for (pos = 0; pos <= 180; pos += 45) {
    // tell servo to go to position in variable 'pos'
    servo_9.write(pos);
    digitalWrite(trigPin, LOW);
    delayMicroseconds(5);
    // Trigger the sensor by setting the trigPin high for 10 microseconds:
    digitalWrite(trigPin, HIGH);
    delayMicroseconds(10);
    digitalWrite(trigPin, LOW);
    // Read the echoPin, pulseIn() returns the duration (length of the pulse) in microseconds:
    duration = pulseIn(echoPin, HIGH);
    // Calculate the distance:
    distance = duration * 0.034 / 2;
    // Print the distance on the Serial Monitor (Ctrl+Shift+M):
    Serial.print("Distance = ");
    Serial.print(distance);
    Serial.println(" cm");
    delay(1000);
  }
  for (pos = 180; pos >= 0; pos -= 45) {
    // tell servo to go to position in variable 'pos'
    servo_9.write(pos);
    digitalWrite(trigPin, LOW);
    delayMicroseconds(5);
    // Trigger the sensor by setting the trigPin high for 10 microseconds:
    digitalWrite(trigPin, HIGH);
    delayMicroseconds(10);
    digitalWrite(trigPin, LOW);
    // Read the echoPin, pulseIn() returns the duration (length of the pulse) in microseconds:
    duration = pulseIn(echoPin, HIGH);
    // Calculate the distance:
    distance = duration * 0.034 / 2;
    // Print the distance on the Serial Monitor (Ctrl+Shift+M):
    Serial.print("Distance = ");
    Serial.print(distance);
    Serial.println(" cm");
    delay(1000);
  }
}'Embedded > Arduino' 카테고리의 다른 글
| 01. Arduino 설치하기 (0) | 2021.06.09 |
|---|---|
| 초음파센서+브라킷+서보모터 (0) | 2021.05.26 |
| CH08 -1) 푸시버튼 사용하기 - II (0) | 2020.10.23 |
| CH07 -1) 푸시버튼으로 LED제어 (0) | 2020.10.12 |
| CH06 - 1)피에조(Piezo) 스피커 (0) | 2020.10.10 |


